Anthurium Propagation Made Simple: Tips for Success

Why Anthurium Propagation is Worth Your Time
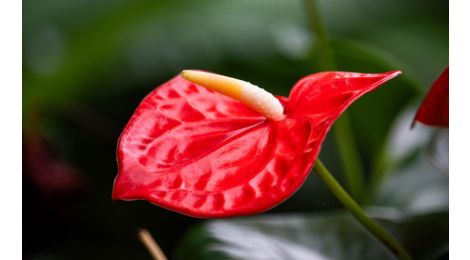
Anthurium propagation is gaining popularity among plant enthusiasts for a good reason: it's a rewarding and cost-effective way to multiply your anthurium collection. Whether you're a novice or a seasoned gardener, propagating anthuriums offers a sense of fulfillment and allows you to share these stunning plants with friends and family.
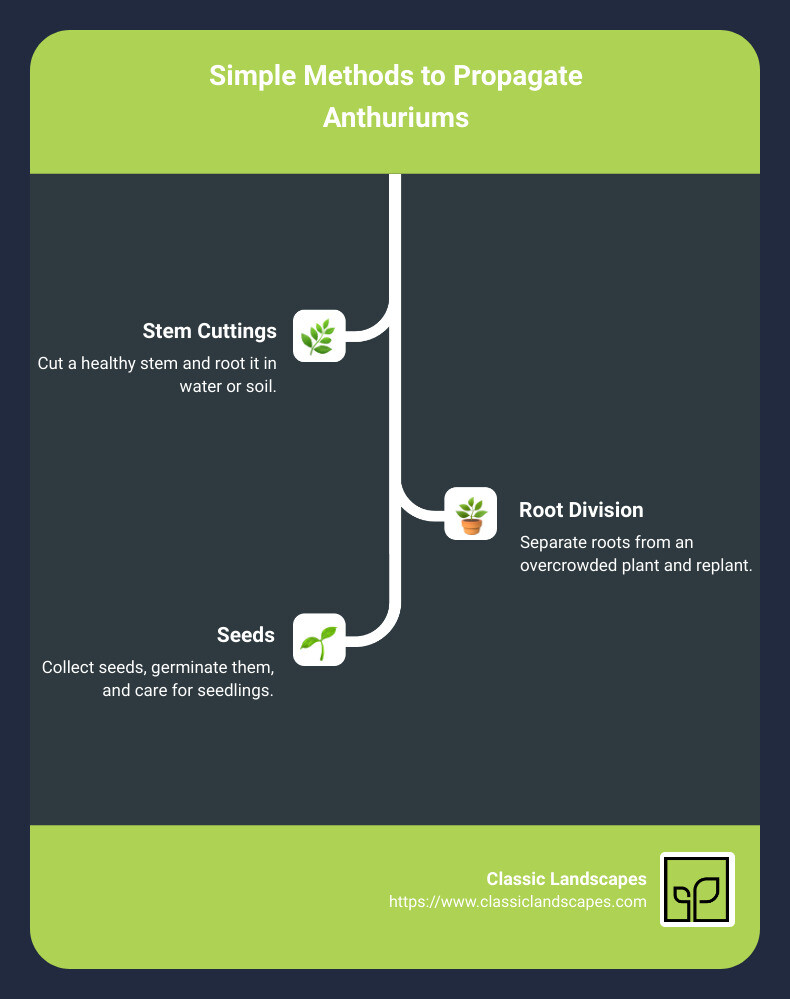
Here's a quick overview of the best methods for anthurium propagation:
- Stem Cuttings: Simple, effective, and fast.
- Root Division: Ideal for overcrowded anthuriums, offering quick results.
- Seeds: Time-consuming but rewarding.
I'm Josh Payne, owner of Classic Landscapes with over 25 years of experience in landscape and garden services. My team and I specialize in creating beautiful, functional outdoor spaces for our Edmonton clients. I'm here to share everything you need to know about anthurium propagation. Let's explore the details that will make your propagation journey a success!
Understanding Anthurium Propagation
Propagating Anthurium can be a fun and rewarding experience. There are three main methods: stem cuttings, root division, and seeds. Each method has its own timing and tools that can help you succeed.
Best Time to Propagate
Timing is crucial for successful anthurium propagation. The best time to propagate is during the growing seasons of spring and summer. This is when the plant is most active and can recover and grow more quickly.
- Spring: Ideal for all methods of propagation.
- Summer: Also a good time, but be mindful of high temperatures which can stress the plant.
- Autumn: Possible, but the plant's growth slows down, making it less ideal.
- Winter: Not recommended due to the plant's dormancy and slower growth.
Essential Tools and Equipment
Having the right tools and equipment can make a big difference in your success. Here's what you'll need:
Basic Tools
- Pruning shears: Essential for taking clean, precise cuttings. Make sure they are sharp and sterilized to prevent disease.
- Fresh, well-draining potting mix: A mix of peat moss, perlite, and bark chips is ideal.
- A small pot or container: Use one filled with your potting mix.
- Perlite: Helps with drainage and aeration if you're rooting in soil.
Optional but Helpful Tools
- Rooting hormone: Encourages faster root development.
- A pot with water: Useful for cleaning roots if you're using the root division method.
- Moisture meter: Ensures your cutting gets the right amount of water.
- Gloves: Protects your hands from any sap and keeps things hygienic.
Using these tools, you'll be well-equipped to start your anthurium propagation journey. Now, let's move on to the specific methods of anthurium propagation in the next section.
Methods of Anthurium Propagation
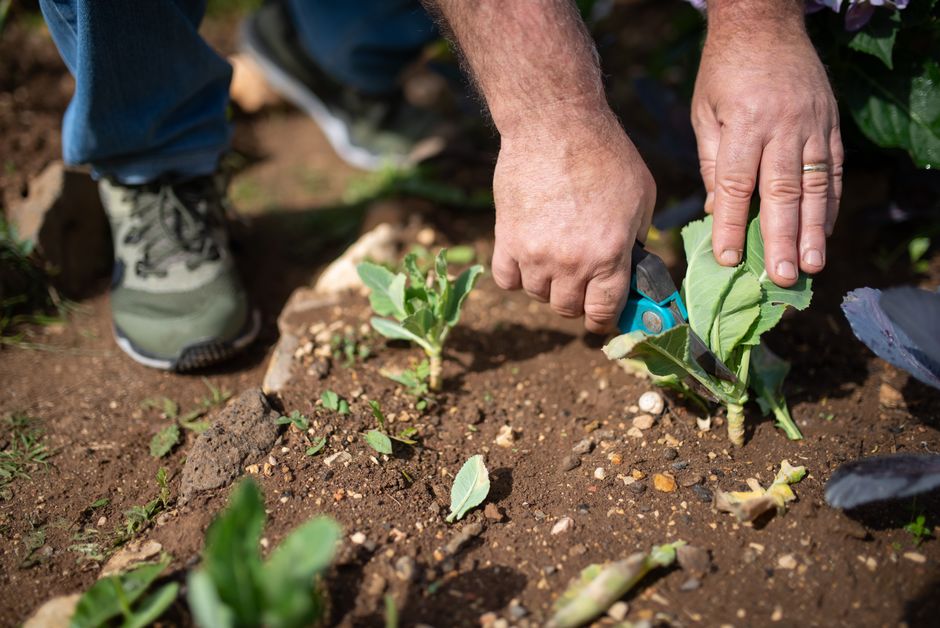
Propagating Anthurium from Stem Cuttings
Propagating anthuriums from stem cuttings is popular and straightforward. Here’s how to do it:
- Healthy Plant: Start with a pest-free, healthy anthurium. A strong parent plant increases the chances of successful propagation.
- Cutting Process:
- Use clean pruning shears.
- Cut a 6-8 inch section of stem from a leafy part, making a clean cut at a 45-degree angle.
- Dip the cut end in rooting hormone to encourage root growth.
- Rooting in Water:
- Place the cutting in a jar of water.
- Change the water weekly to prevent mold.
- Roots should appear in 4-6 weeks.
- Rooting in Soil:
- Plant the cutting in moistened, well-draining potting mix.
- Keep the soil moist but not soggy.
- Provide bright, indirect light.
- New growth should appear in 6+ weeks.
Propagating Anthurium from Root Division
Root division is ideal for mature, overcrowded plants. Here’s how to separate and replant them:
- Overcrowded Plants: Look for a plant that has outgrown its pot, with visible roots or multiple stems.
- Root Separation:
- Carefully remove the plant from its pot.
- Gently separate the roots, ensuring each division has healthy roots and leaves.
- Use a pot with water to clean the roots if needed.
- Replanting:
- Plant each division in a separate pot with fresh, well-draining potting mix.
- Water thoroughly.
- Place in a warm, humid location with indirect light.
Propagating Anthurium from Seeds
Growing anthuriums from seeds is a longer process but can be rewarding. Here’s how to do it:
- Seed Collection:
- Collect seeds from mature anthurium flowers.
- Clean the seeds to remove any pulp.
- Germination:
- Plant seeds in a shallow tray with a mix of peat and perlite.
- Keep the soil moist and cover with plastic wrap to maintain humidity.
- Place in a warm spot with indirect light.
- Seeds should germinate in 1-2 months.
- Seedling Care:
- Once seedlings appear, remove the plastic wrap.
- Transplant seedlings into individual pots when they have 2-3 leaves.
- Continue to provide bright, indirect light and keep the soil moist.
These methods of anthurium propagation will help you grow new plants successfully, whether you choose stem cuttings, root division, or seeds. Next, let's explore the best rooting media for your anthurium propagation.
Best Rooting Media for Anthurium Propagation
Choosing the right rooting media is crucial for successful anthurium propagation. Each medium has its benefits and can influence the growth of your new plants. Let’s dive into the options:
Water
Water is a popular choice for beginners. It’s low maintenance and allows you to see the roots as they develop, making it easy to monitor progress.
- Pros: Simple setup, easy to monitor root growth.
- Cons: Roots may be weaker compared to soil-grown ones.
Tip: Use clean, filtered water and change it when it becomes cloudy.
Soil
Soil is great for stronger root development and easier transition to a permanent pot. A good quality potting mix with high aeration is essential.
- Pros: Stronger roots, easier transition to permanent soil.
- Cons: Requires more attention to moisture levels.
Tip: Mix in perlite, vermiculite, or coconut coir for better aeration and drainage.
Perlite
Perlite is a lightweight, volcanic rock that helps with drainage and aeration. It’s often used in combination with other media.
- Pros: Excellent drainage, prevents root rot.
- Cons: Doesn’t retain moisture well on its own.
Tip: Combine perlite with soil or sphagnum moss for balanced moisture and aeration.
LECA (Lightweight Expanded Clay Aggregate)
LECA consists of clay pellets that provide excellent aeration and support for roots. It’s perfect for hydroponic setups.
- Pros: Great aeration, reusable, low risk of over-watering.
- Cons: Requires nutrient solutions for feeding.
Tip: Use LECA in a hydroculture system with a nutrient solution to keep your anthurium healthy.
Moss
Sphagnum Moss is fantastic for retaining moisture while providing aeration. It’s especially useful for rooting cuttings.
- Pros: Retains moisture, prevents rot, easy to use.
- Cons: Needs regular misting to stay moist.
Tip: Keep the moss lightly moist and place it in a humid environment for best results.
Choosing the right rooting medium depends on your preference and the specific needs of your anthurium. Each medium offers unique benefits, so experiment and find what works best for you!
Next, let’s discuss how to care for your newly propagated anthuriums.
Caring for Propagated Anthuriums
Light Requirements
Anthuriums thrive in bright, indirect light. Too much direct sunlight can bleach or burn their leaves, while too little light will result in fewer blooms and stunted growth.
Filtered sunlight is ideal. If you can't provide this, place your anthurium near an east-facing window. This ensures it gets gentle morning light without the harsh afternoon sun.
Grow lights can also be a great option if your home doesn't get much natural light. These lights can mimic the sun's rays and help your anthurium grow healthy and vibrant.
Watering and Humidity
Consistent watering is key to healthy anthuriums. Keep the soil moist but not soggy. A good rule of thumb is to let the top inch of soil dry out before watering again. If the leaves start to wilt, it's a sign that your plant needs water.
Anthuriums love high humidity. To create a humid environment:
- Use a humidity tray: Place your potted anthurium on a tray filled with gravel and water. As the water evaporates, it adds moisture to the air around the plant.
- Misting: Regularly mist around your anthurium with a spray bottle. Be careful not to oversaturate the leaves to avoid leaf rot.
A humidity meter can help you keep track of the moisture levels and ensure your plant is in the best conditions.
Fertilizing Propagated Anthuriums
Fertilizing is essential for the growth and health of your anthurium. Use a fertilizer formulated for anthuriums or other acid-loving plants.
- Frequency: For the first couple of months after propagation, use only half of the recommended amount. Over-fertilizing can shock your plant. After that, fertilize monthly during the growing season (spring through fall) and reduce to every other month during winter.
- Application: Follow the manufacturer's instructions carefully. It's better to use less fertilizer than too much. This ensures you don't harm your plant.
By providing the right light, consistent watering, optimal humidity, and proper fertilization, your propagated anthuriums will thrive and bring beauty to your home.
Common Problems and Solutions
When propagating anthuriums, you might face a few common issues. Understanding and addressing these problems early can make a big difference.
Light Issues
Problem: Not enough light can lead to fewer blooms and weak growth. Too much light can bleach or burn the leaves.
Solution: Place your anthuriums in a spot with bright, indirect light. Filtered sunlight is ideal. If natural light is limited, use grow lights. An east-facing window works well too.
“Too little light will result in fewer blooms and overall lackluster growth. Conversely, too much light can cause the leaves to become bleached or burned.” (source)
Root Space
Problem: If the roots don't have enough space, they can crowd each other. This prevents the plant from getting the nutrients it needs.
Solution: Use a pot that allows room for growth. Ensure the container has drainage holes. If you notice crowded roots, consider repotting into a larger pot.
“If the roots do not have enough space, they will start to crowd each other and the new plants will not be able to get the nutrients they need to grow.” (source)
Pests
Problem: Common pests include spider mites, mealybugs, and leaf spot disease.
- Spider mites: Produce fine webs and cause brown leaf discoloration.
- Mealybugs: Slow-moving aphids that leave light-colored spots on leaves.
- Leaf spot disease: Causes patchy discoloration and wilted leaves.
Solution: Regularly inspect your plants. If you spot pests, use insecticidal soap or neem oil. For leaf spot disease, remove affected leaves and improve air circulation around the plant.
“The most common pests are spider mites, mealybugs, and leaf spot disease.” (source)
Diseases
Problem: Diseases can cause discoloration, wilting, and poor growth.
Solution: Maintain proper watering practices. Avoid overwatering, as it can lead to root rot. Ensure good air circulation and keep the plant in a well-ventilated area. Clean tools before use to prevent disease spread.
By addressing these common problems, you can ensure your anthurium plants stay healthy and vibrant.
Next, let’s dive into some frequently asked questions about anthurium propagation.
Frequently Asked Questions about Anthurium Propagation
Can you propagate Anthurium from leaf cuttings?
Yes, you can propagate anthurium from leaf cuttings, but it’s not the most reliable method. While some people have had success, it's generally more challenging and less effective than using stem cuttings or root division.
"Stem cuttings generally have a higher success rate and develop roots more quickly." (source)
How long does it take for Anthurium cuttings to root?
The time it takes for anthurium cuttings to root can vary. Typically, you can expect roots to develop within 4-8 weeks. Factors like temperature, humidity, and the health of the cutting can influence this timeframe.
"In general, you can expect Anthurium cuttings to develop roots in 4-8 weeks." (source)
What is the best soil mix for Anthuriums?
Anthuriums thrive in a well-draining, nutrient-rich potting mix. The ideal soil should be slightly acidic, with a pH between 4.5 and 5.5. A mix amended with compost or worm castings works well. Ensure the soil has good aeration to avoid waterlogging, which can lead to root rot.
"Use a well-draining, nutrient-rich potting mix amended with compost or worm castings." (source)
For more detailed guidance on soil mixes and other tools, Classic Landscapes offers a variety of growing supplies to help you get started.
Next, let’s explore the best rooting media for anthurium propagation.
Conclusion
Anthurium propagation is a rewarding way to expand your plant collection and share these beautiful plants with friends. By following the methods of stem cuttings, root division, and seeds, you can successfully propagate anthuriums and enjoy their vibrant blooms year-round.
Classic Landscapes is here to support you every step of the way. Our experienced team offers expert advice and high-quality supplies to ensure your anthurium propagation is a success. Whether you're a novice or an expert, we have everything you need to create a thriving green space.
Final Tips for Success
- Timing is Key: Propagate during spring and summer for the best results.
- Choose the Right Tools: Sterilize your cutting tools and use a well-draining potting mix.
- Provide Proper Care: Ensure your new plants receive indirect light, consistent watering, and high humidity.
For more information on caring for your anthuriums and other houseplants, visit our Anthurium Flamingo Plant page.
Happy propagating!